I’ve finished nothing for ages! I’m starting to feel a little bad about it I have to confess. WIPs are piling up around me. Quincy has no hope of a second leg yet, the Mystery KAL is languishing in my knitting drawer, Daphne hasn’t seen daylight for weeks! Young Einstein has made progress though and with a bit of luck I’ll have it done this weekend. I’ve just divided for the sleeves and I have about 7 inches more of the cardigan to knit, plus the sleeves and the collar, but it’s moving along nicely and I’m happy with my progress.
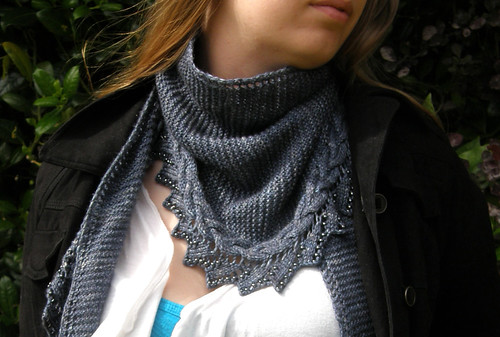
The only thing I’ve finished in the last few weeks is Storm Warning, which I finished on the 12th – just in time for Ravellenics, but hadn’t shown you until Tuesday. I’m going to talk more about my design process today so it’s still interesting if you’ve already read Tuesday’s post! If you haven’t, read this post first, then go and sign up for the giveaway if you like it! I’m giving one copy of the pattern away, just let me know what yarn you’d knit it with, and you’ll be entered into a random draw on Tuesday 4th (next week).
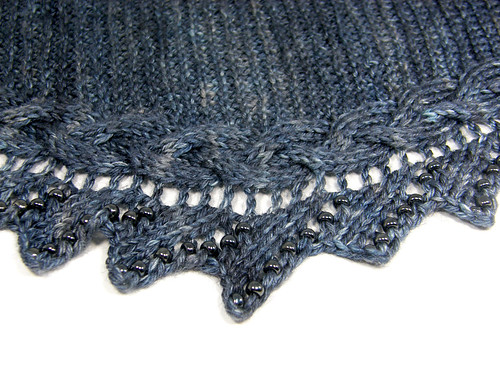
Storm Warning is my second design. I really love how it’s turned out! It’s knit sideways so you get the maximum use out of your yarn. I designed this one in a completely different way to my first shawl. With Flying Without Wings I knew I wanted to design a shawl using a feather pattern, and then I set to work to design it, working from the bottom up – my favourite style. With Storm Warning, I was designing it for the HPKCHC and for Ravellenics. I wanted to knit a shawl that could get into as many different categories as possible.
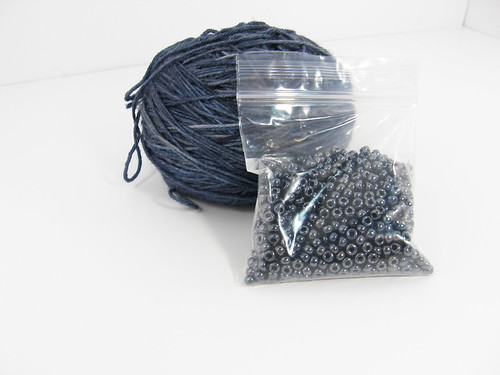
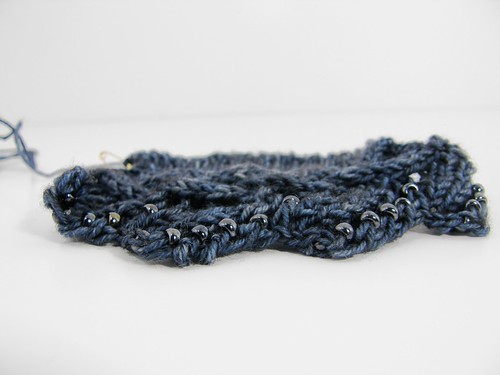
Firstly I knew I wanted to make a shawl, so I just had to pick other categories to go with it. I had a gorgeous skein of Old Maiden Aunt Merino/Silk that I wanted to use, so it was going to be a single skien shawl. Along with that my options were lace, cables and beads, since I didn’t want to give it to charity, and wasn’t sure about giving it as a gift. A search of the patterns on Ravelry didn’t bring up anything I liked so I had to set off to make my own. The first thing I did was find out about using beads since I’d never done that before. Research discovered, on a link I’ve now lost, that size 6/0 seed beads are perfect for fingering weight yarn, that prestringing could rub delicate yarns like silk blends and that dark beads add depth. So I went bead shopping and got some gorgeous gunmetal seed beads that I thought would be perfect.
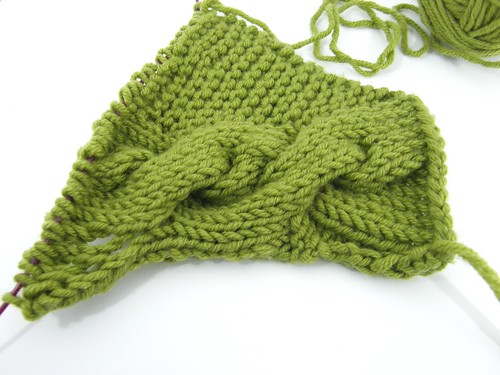
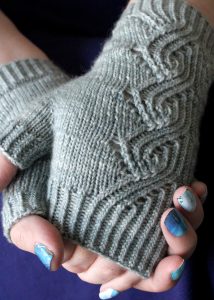
The next challenge was the cable. There are hundreds of cable patterns out there! I decided on the width I wanted my cables to be, and did swatches of the cables I particularly liked. I settled on a plaited cable simply because I love plaits. My hair was always plaited for parties as a child and I even had plaits on my wedding day. They’re classic, not too showy yet not boringly simple and I love them! It’s also pretty easy to follw where you are in the pattern with the plaits and easy to see which way you should be crossing the stitches for the cable.
Now I had my cable I knew what my pattern repeat would be and the challenge was to make lace that would fit into the repeat, have space for beads, be delicate and simple and not too showy. I decided to separate the lace and cables with a row of eyelets. These eyelets gave me a constantly growing border so I decided to offset that with bind-offs every few rows. The result has the same sort of shape as sawtooth lace. The last stage was to do lots of swatching and figure out which stitch was best to add the bead to. The method I chose to use to add the bead was with a tiny steel crochet hook, and I included a photo tutorial in the pattern for anyone who was new to beading.
The last thing to do was put it all together and knit it! I managed in just over a fortnight which makes it one of my fastest shawls ever. Pattern writing does seem to be getting easier with time. Although this pattern was easier than my first, I did find it a little trickier to work out how to phrase things. I think our photography is improving too. My husband is in charge of doing the photos while I model. It’s pretty hard for me because I hate being in front of the camera! I’m also not keen on losing control over how the photos look, but with time we are starting to work out what works for both of us – like not getting my face in the photo because I invariably have a squint or my mouth open or I’m pulling a face! We took these photos in one of our local parks and the rhododendron bushes made a great backdrop.


10 Comments on Storm Warning
You did a beautiful job and the edging makes the shawl!! Great yarn choice to showcase the edging 🙂
Lovely design! Congratulations. And I love that you explained it all so nicely. I’m always lost for words when it comes to that…
I love your pattern and it was very interesting to read how you came up with it. The result is gorgeous!
Thank you so much for describing your process, it was very interesting to hear about. I think that the beads really add that something special to the pattern. I’m also attracted to the points of the edging, definitely a successful design!
Oh man, this is absolutely gorgeous! I’m no such a bead crochet kick too I may have to give one a whirl 😉
I love hearing the process for your designs! So inspiring– I totally love your finished product 🙂
Beautiful! I’ll have to bookmark this pattern for later. It’s interesting to hear about the design process, because it’s something I’ve always wanted to do, but don’t really know how to go about it!
The shawl is really beautiful! I haven’t attempted to incorporate beading into a knit yet, though I did buy materials to do so…about two years ago. (EEP!) Maybe it’s time I give it a go.
So pretty! The cable detail is just lovely!
It looks great, and I agree, giving over control of the photos of your design is tough! My bf always wants to highlight my face and I’m always wanting to highlight the yarn details. But, with training, I’m sure your husband will be fine :).